
Configure checkout
Payments and express wallets
Configure payment methods in WooCommerce, then test the exact gateways and wallet paths your store will offer.
Where to go WooCommerce → Settings → Payments
Set up your gateway
- Configure the gateway in WooCommerce
Enable a payment method under WooCommerce → Settings → Payments and complete that gateway’s own setup. Trim Checkout does not create a merchant account or replace payment processing. - Use the gateway’s sandbox
Open Trim Checkout with an eligible test cart. Test a successful payment, a decline, any redirect or 3DS challenge, and the return to your store. - Check the order and confirmation
Verify the final amount, paid status, gateway reference and confirmation page. Check guest and signed-in shoppers where relevant. - Test express buttons separately
If your gateway supports an express wallet, test it on the required browser/device with an eligible account, currency and registered domain. Repeat with any required custom fields.
Express payment buttons are conditionalApple Pay, Google Pay and other express options depend on the gateway integration, merchant account, domain, browser, device and currency. A visible button is not proof that the whole payment flow works.
Relevant Trim settings
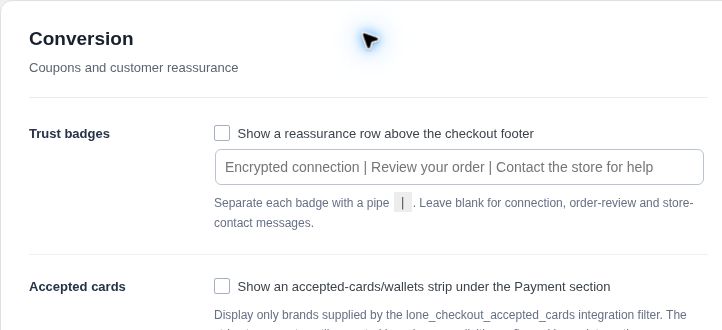
- Accepted cards · Conversion
- Optional brand strip under Payment. It stays empty until accepted brands are supplied by an integration. It does not enable a gateway or wallet.
- Shopify-style thank-you page · General
- Test the standalone confirmation layout with your gateway. Disable it if that gateway requires its own template.
- Required custom fields · Fields
- Check both ordinary submission and express-wallet submission. They can follow different paths.
Check before you finish
- The gateway supports WooCommerce’s classic checkout.
- Both success and failure flows have been tested in the gateway sandbox.
- Shipping, discounts and final totals match the order.
- Confirmation access and gateway redirects work for guests.
- No second checkout replacement is active.